Once you remove the timing
belt covers you can go to work cleaning them off inside and out.
Get ALL the grease off. Take advantage of the time that you are
using to paint and wait for the paint to dry by jacking up the
car, removing the splash guard, and cleaning out all the grease,
oil, and dirt you can. This is good for many reasons: looks,
cleanliness,
and to find out where you may have leaks (coolant/oil). Now you
can prep the timing belt covers. I only prepped the outside of
the covers...the paint on the inside was still solid and shiny
after cleaning it, and you have no need of painting the insides.
The PGet some paint stripper (I used spray can
paint stripper) and follow the directions on the can to remove
the outside layer of paint. You may have to apply and clean the
covers several times. Have a "light" metal bristle brush
handy to get the loose paint off...even a tooshbrush will help.
You want to make sure all the loose paint is off. If there is
any paint that is on really tight, you can either continue tryi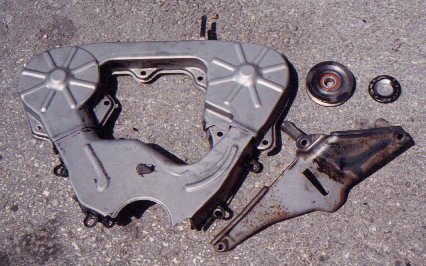 ng
to work it out with stripper, or lightly sand it and use stripper
again to get the rest off. Make sure your surfaces are left clean
and free of loose paint. Here's what you might see when they are
ready. Oh yeah, prep the idler pulley crossmember, too.
ng
to work it out with stripper, or lightly sand it and use stripper
again to get the rest off. Make sure your surfaces are left clean
and free of loose paint. Here's what you might see when they are
ready. Oh yeah, prep the idler pulley crossmember, too.
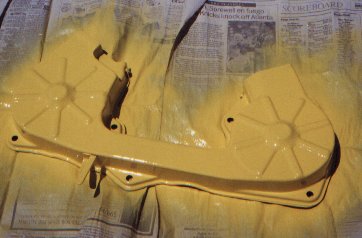
These are as prepped as I was willing to get them...they are actually quite ready...the idler pulley crossmember looked a little hashed but its really not bad. I sanded a little rust off of it before continuing. The next step is to give the parts a couple coats of good primer. I just used Rustoleum grey primer. They looked nice just like that, but not near as nice as they would look. Let the primer dry and then you're ready for the color you choose. Go with the classic red or switch it up with blue...or if you want to go all out...go YELLOW!!!
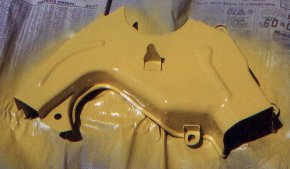
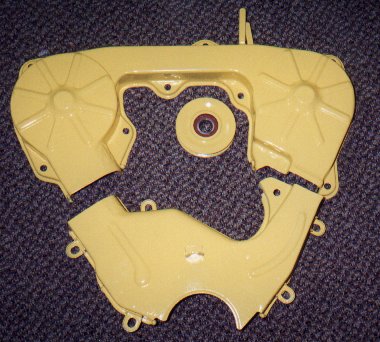
Alright!!! Looks pretty
good. I painted the idler pulley crossmember black to give a good
constrast for the idler pulley. While I was doing the timing covers
I replaced the water pump, the alternator, the water pump pulley,
and the crankshaft pulley. The reason why can be found here: Putting
a Maxima
alternator in your Z31. I am very pleased with the way the
timing covers turned out. I do plan to do the valve covers yellow,
but that'll have to wait until I get a 240SX throttle body. I
don't want to remove all that crap until I can do everything at
once. I have already done it once to clean up, and it was done
a second time when the head gaskets were replaced. So just hold
on and en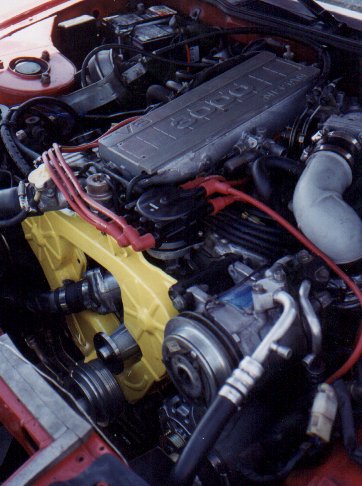 joy the look it has now until I
get those cam covers (valve covers) done. Here's a final pic of
the engine bay...also notice the shine of the new alt. and the
Underdrivepulley.
It just looks nice. I also found out during the course of this
work that the metal
joy the look it has now until I
get those cam covers (valve covers) done. Here's a final pic of
the engine bay...also notice the shine of the new alt. and the
Underdrivepulley.
It just looks nice. I also found out during the course of this
work that the metal 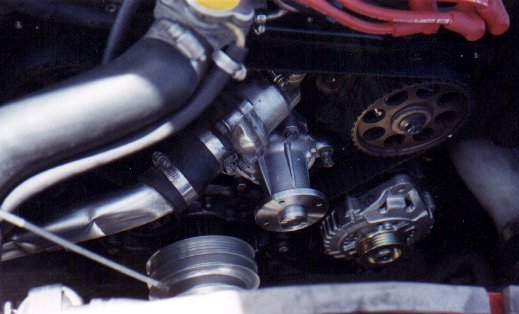 coolant pipe (lower rad. hose assembly)
is stainless steel...sure didn't look like it before. I took some
light sand paper to it and it the stainless steel came shining
through. A good pic of that is on the right.
coolant pipe (lower rad. hose assembly)
is stainless steel...sure didn't look like it before. I took some
light sand paper to it and it the stainless steel came shining
through. A good pic of that is on the right.