Z32 Differential Seal
Replacement
Cleanup/Paint, and ES Bushing Installation
(notes)
THANKS TO
EVERYONE that responded to my hundreds of posts while working on
the differential.
Specific thanks to Musky & Spddracer
This page discussed the following topics, in this order:
Differential Seal Replacement (See Differential Removal Here) with Cleanup and Painting (Spiffing Up)
Energy Suspension (ES) Bushing Installation and Differential Reinstallation Help
Differential Seal Replacement, Cleanup and Painting
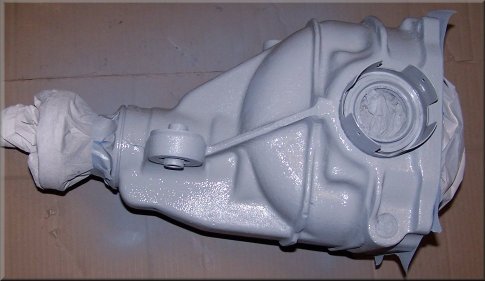
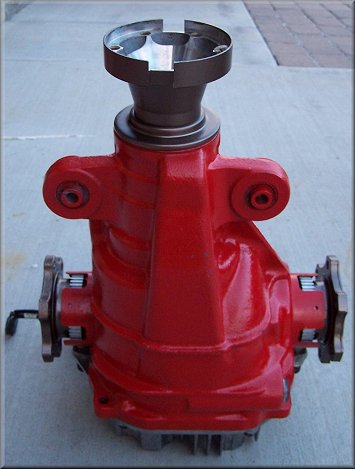
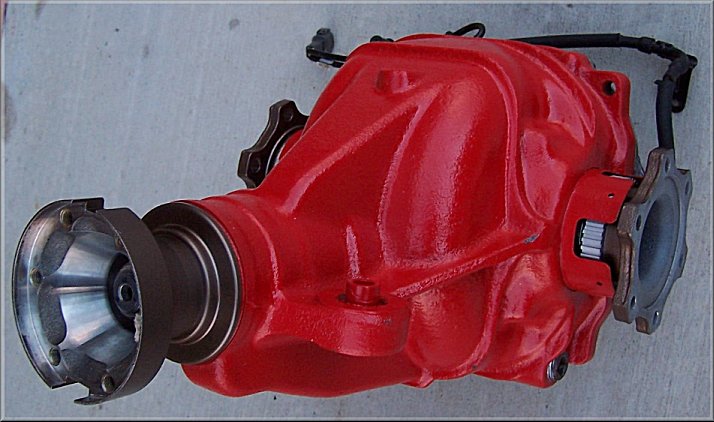
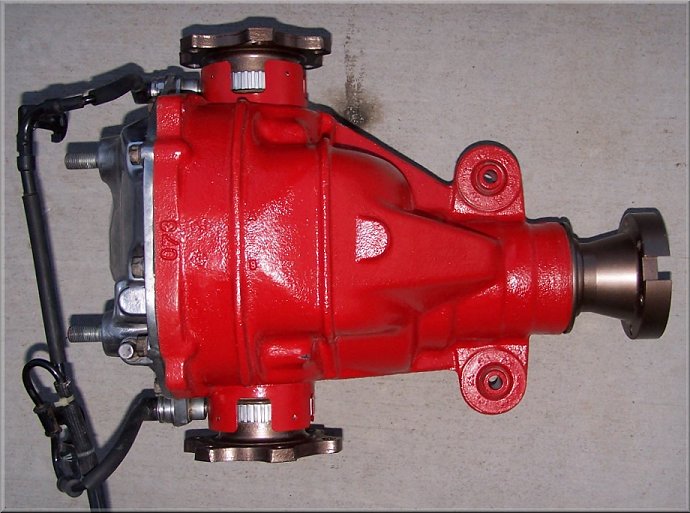
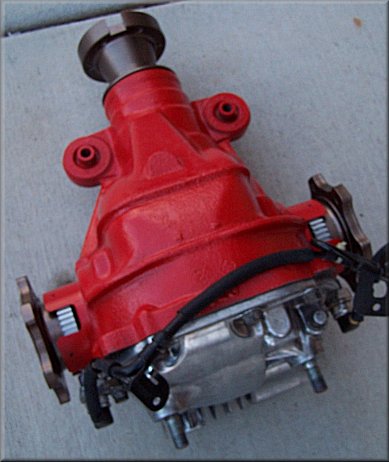
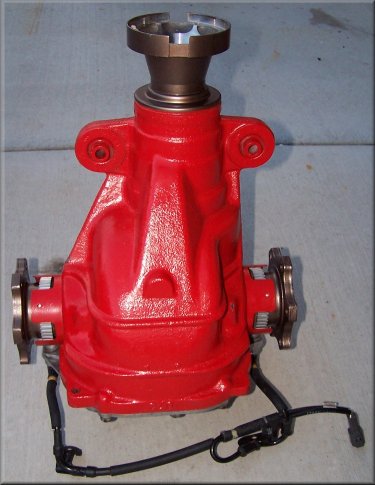
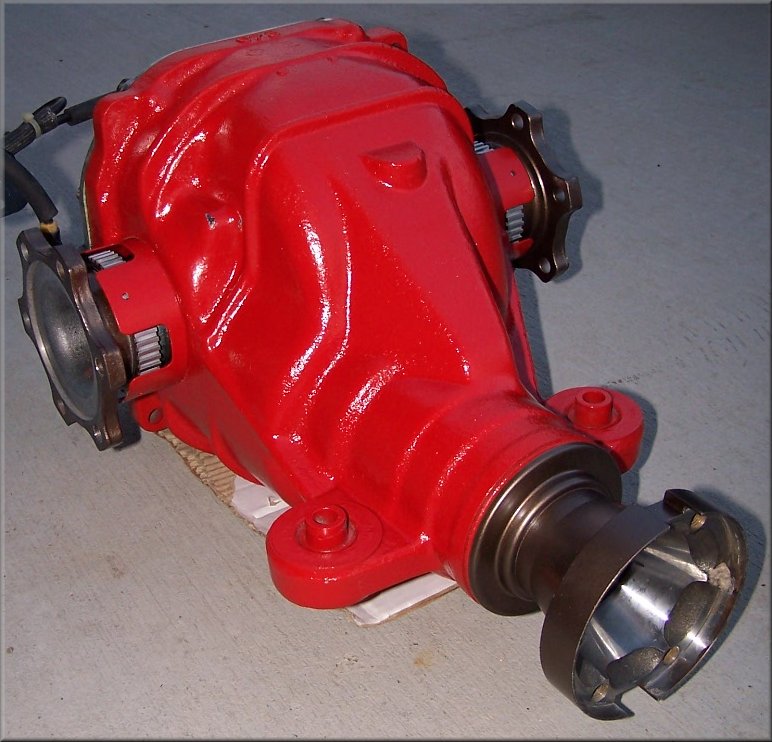
This section discussed replacement of the differential seals on a '91 TT differential. At some point you may notice leaking from one of FOUR seals in the differential. You'll want to fix it, especially if you find your fluid level (gear oil) doesn't stay full. I pulled my diff, cleaned it up, painted it, and replaced all the seals and diff fluid (with appropriate Redline gear oil). Painting the diff is certainly one of the best mods I've done -- easily 20 PHP (placebo horsepower : )
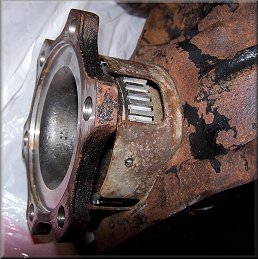
There is a front seal, two side seals, and the rear seal (gasket). I noticed my front seal was leaking -- along with some "clank" upon shift/decel/braking and the fact that my differential fluid has NEVER been changed, I decided to pull the differential and get everything done at once, and of course, get the chunk of greasy steel cleaned up and painted.
It all turned out to be a bit tougher than expected. Removal was pretty straight forward by following the FSM and writeups on TT.net (Bushing Replacement FAQ). I jacked up the car on four stand (front and rear) and was able to get most of the bolts loose on my own (continuously jumping out from and back under the car to release the e-brake). The nuts holding the rear studs from the diff were the toughest part of removal. Get yourself a mid-deep 1/2" socket, a U-joint, a good 1/2" breaker bar, and a 6" extension...and you may want a helper for this. I'm sure other methods will work -- I tried a generic air-impact wrench for about 30 seconds and it didn't budge the nut at all. I also had a bit of trouble getting the diff pushed far enough forward to clear the studs from the rear mounting holes -- had to do a bid of prying (against diff and subframe - DON'T PRY ON HICAS if you have one).
Once we pulled it, it was obvious a lot of work was ahead. I would like to note that the FSM says you can replace all these seals with the differential IN THE CAR -- Good luck with that. I'd pull it and do a bunch of cleanup while you can.
One quick tip, which may ever help make the bushing installation easier --- do this is warm weather. Cold sucks. It's been a rather cold, long winter in Utah this year (2005-2006) -- not too much snow in the valleys, but still cold and frosty every morning.
Prepping the differential for new paint was a pain. Before pulling anything off, get heavy deposits removed, then move onto using a crap load of Simple Green, scrub brushes, toothbrushes, etc, and go to town. You could probably benefit from the use of a CITRUS REMOVER/CLEANER as a lot of this oil and paint is really caked on. A pressure washer may not be a bad thing to have around for this! Just don't pull the seals before you start working on it.
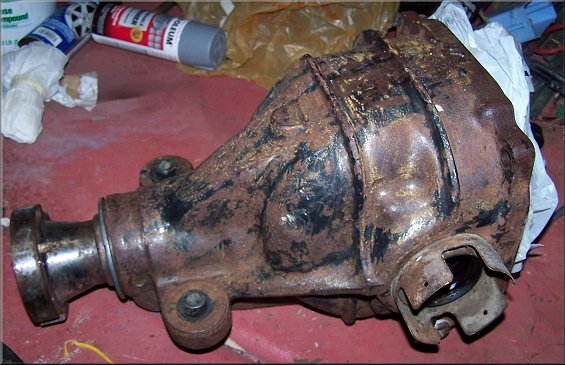
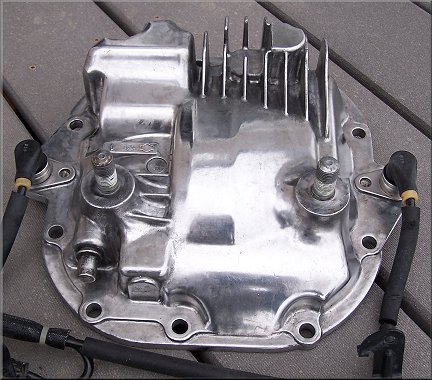
Above is the extent of my prep work. I worked hours to get it to this point.
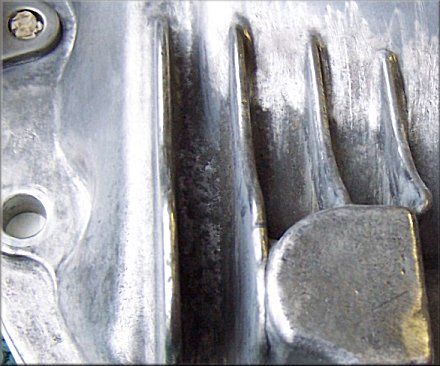
If you want to go an easier route and keep the factory casting, use some dilute sulfuric acid (at your own risk) in a spray bottle and it should clean it up quickly leaving the original cast topography. Spray dilute solution on ALUMINUM ONLY (after cleaning out all oil), let it work only for a bit, and rinse off -- use latex gloves, long sleeves, have a helper, and use in a safe place. I went the route of trying to smooth it out and polish it like many do with the plenum -- I'm so sick of polishing the cover that I'm not even going to talk about it -- just show it. It's by no means perfect, but it does look pretty nice under the car!
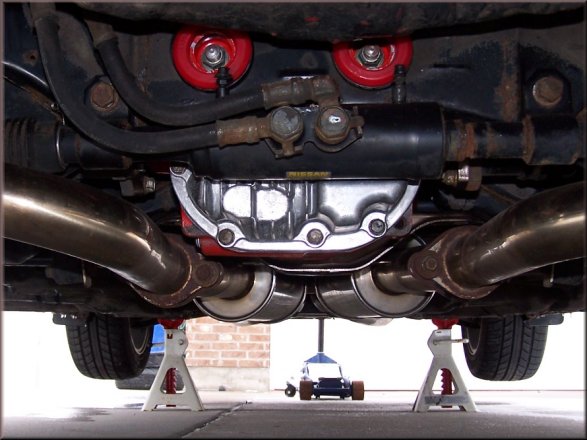
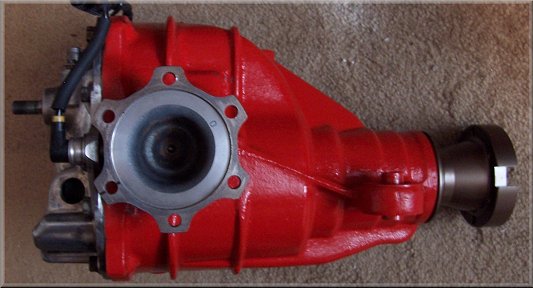
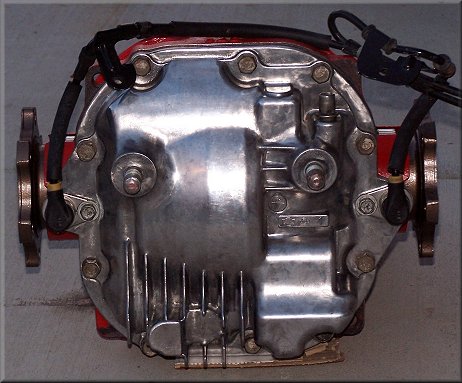
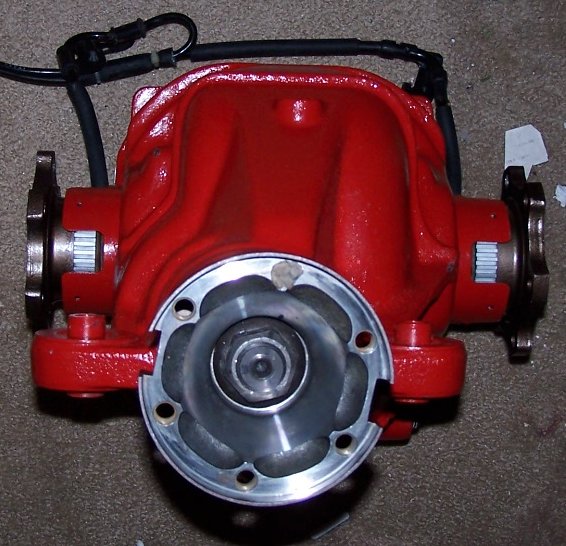
The rear cover can now be removed. Straight forward. Cleaning of the gasket is going to suck. You can find plenty of info on gasket removal since the technique applies to all cars. Just remember the rear cover is aluminum. Although decidedly more intracate than the plenum, use basically the same techniques for polishing if desired.
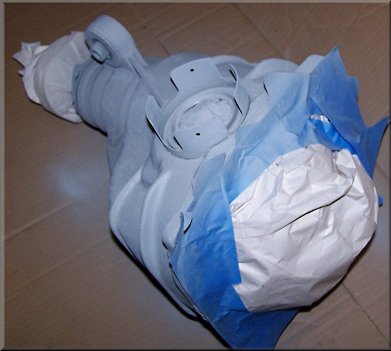
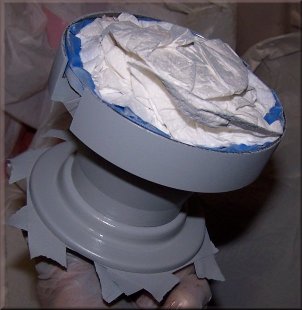
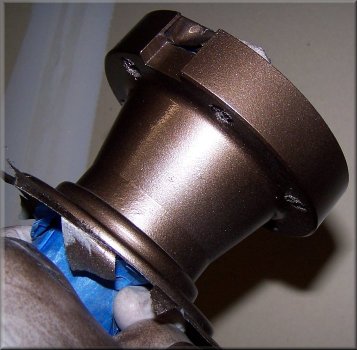
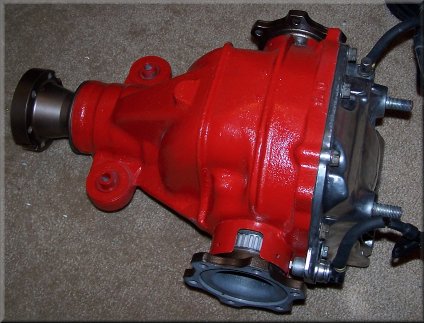
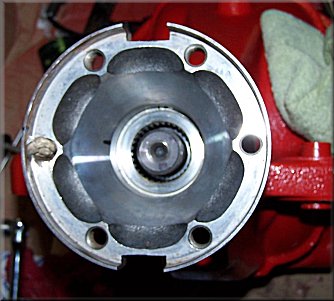
Once you have the body of the differential clean, get it dry and then go to town with wire brushes to remove caked on gear oil, dirt, and paint. Although it was all brown when completed (rusty), I think it was clean enough to go ahead with the primer coat. Granted, it wasn't perfect, but I just wanted it to look decent and be protected from further rusting in the future. Before painting, I removed the side flanges. Once the flanges are off, you can plug the holes with paper towels and get things cleaned up around the dust covers.
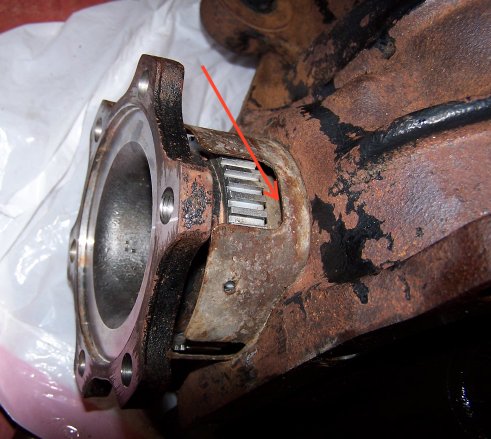
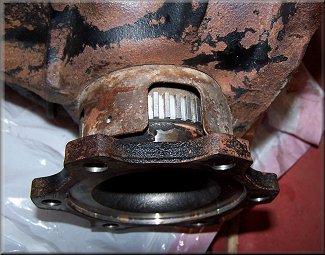
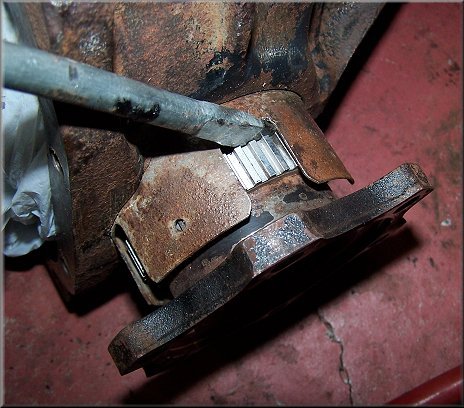
REMOVAL OF SIDE FLANGES
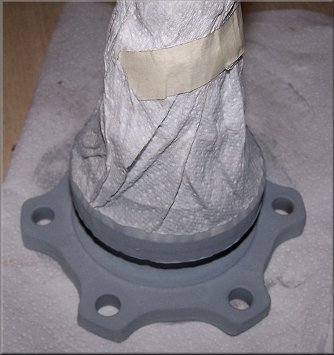
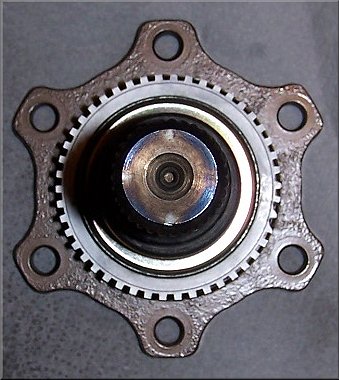
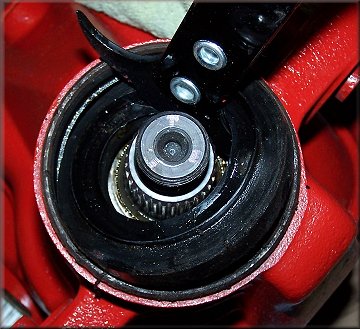
The removal of the side flanges was another task --- again, if I'd known what it took, it would've been a 5 minute job. On the TT (maybe on the NA, too) you'll need to remove the flanges by simply POPPING them out. Get a crow bar ($7 Stanley from Home Depot worked for me), get it set up firmly against the "gear" on the flange, and use the body of the diff to pry. I would suggest keeping away from thin parts of the diff (i.e. around the back end/dust guard), just in case. Maybe use some folded cloths to put the pry bar up against. My bar probably wasn't long enough to just pry the flanges off with -- I used a mallet and gave some firm shots while holding the bar firmly down (don't want to slip and rip up the ABS gear thing). The flanges are held in with C-ring clips. They are located in a bevel inside and snap into a matching bevel in the differential case. The main resistance you are feeling while removing the flanges comes from this ring. When I pulled my flanges, the C-ring stay inside on one side and came out with the flange on the other, causing confusion until I was told there should be a C-clip on each side. Then I looked down the flange hole and found the other one still down there. Pictures are below to explain...I'm not gifted technically to use the proper terminology, and it would probably just be confusing anyway.
PRIMING and PAINTING
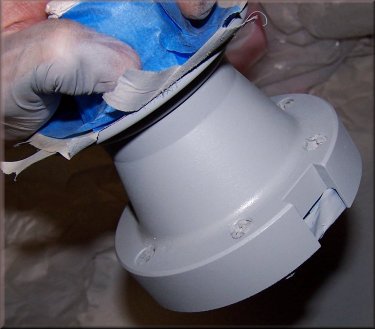
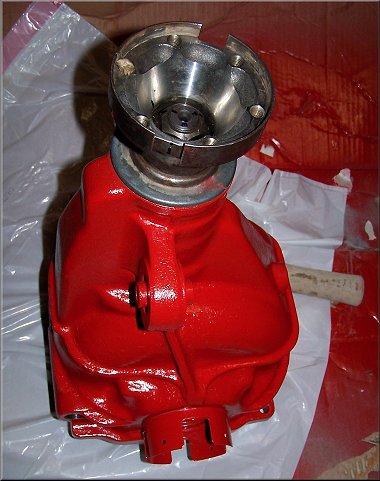
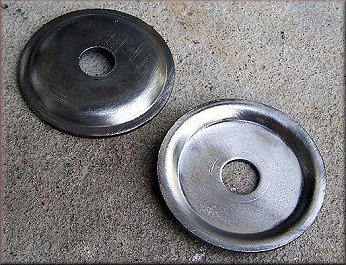
Once I had the flanges off, I made a final cleaning and got ready for paint. I taped things off, plugged up holes with clean paper towels, and went to it. I primed one side first (don't have a stand), let it dry 30 minutes, then flipped it and did the other side. By the way, I painted the cup washers and front washers, too (no pics).
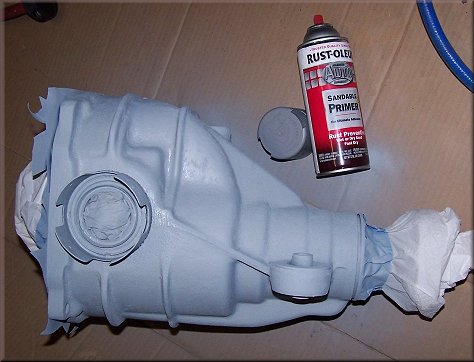

Then I repeated this with paint, giving an initial light (flash) coat, then followed up with two medium coats. It doesn't have to be perfect - after all, it's never going to be seen except by jealous mechanics when the car is up on their rack : ) But, I'm happy with the results. Another reason it doesn't have to be perfect ??? Well, when you try to get this b-turd in you'll find out quickly it isn't going to stay perfect. Unless your lucky, you'll be prying, scraping, scratching, chipping, and more. Still, it will look DANG good for being down there : )
Let this thing dry for a long time so the paint cured. After curing, I pulled the front flange, replaced the seal, installed the side seals, replaced the rear cover (along with new gasket, also using some gasket maker --- don't want to do this again).
PICTURE OVERKILL


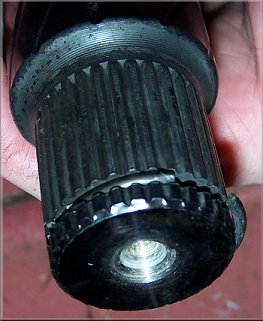
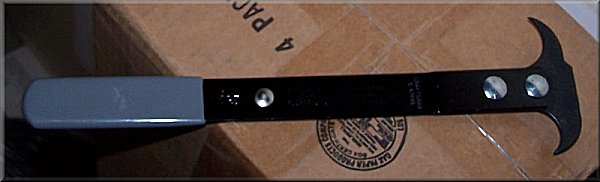
Buy a $5 - $10 seal puller (Harbor Frieght vs. Sears) -- it looks like a Medieval castration device. Very easy to use, just be sure to avoid gouging any mating surfaces. I stuffed a paper towel in the flange hole, below the seal, just to keep junk from getting down there while pulling the seal. I also used a bit of padding under the tool to avoid scuffing my paint job. Immediately after pulling the seals, clean up with clean rags. There could be residual stuff in there. I could've waited to paint until after, but I had the seals on order and I wanted to keep on the project -- also, having the seals there probably helps to avoid getting stuff down in the holes while cleaning and painting. Press new seal in with a suitable tool.
You will need a suitable tool to tap the seals into place. I found using household alternatives (for the tool) frustrating. Once I purchased the tool for the job, they snuck in pretty quickly. Make sure to get them flush in their mounts, not below, not above.
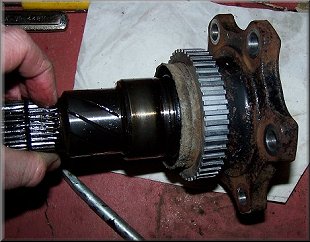
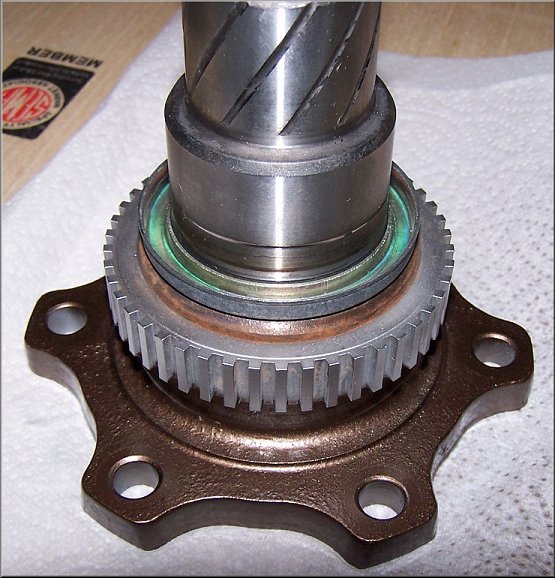
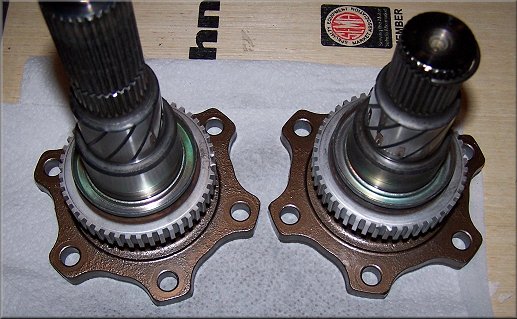
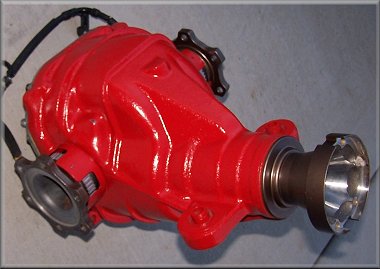
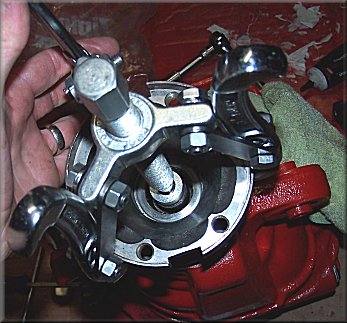
The front seal procedure is described wonderfully in the FSM -- MARK THE NUT with a punch tool or other suitable tool and also mark a position on the shaft with the flange so you can put it back on in the same spot. The reason for this is because you want to realign the driveshaft as it was before, so you want everything else the same, too. Remove the nut (probably will need an impact wrench). you can do the preload testing to be safe.
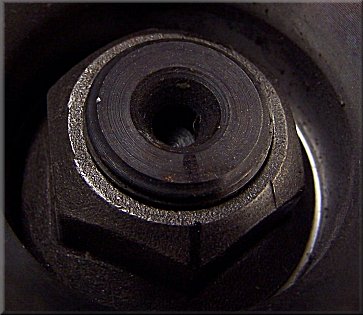
When you have the nut off, use a typical three armed puller to remove the flange, which when then exposes the seal. Replace the seal essentially as described for the side flanges.
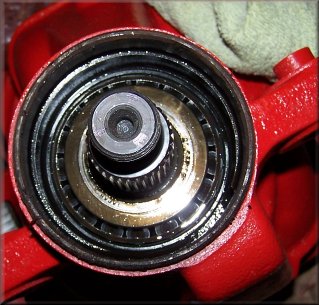
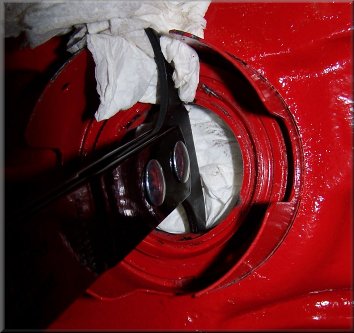
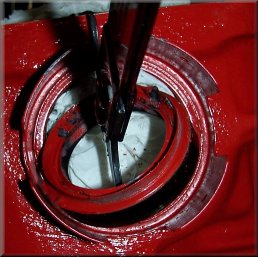
Original Seal (Left), Seal Removal (Middle) and Seal Removed (Bearings now exposed)
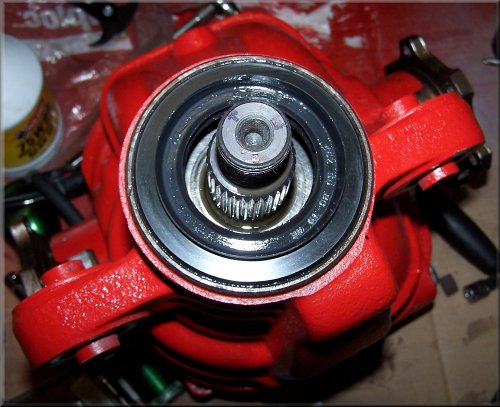
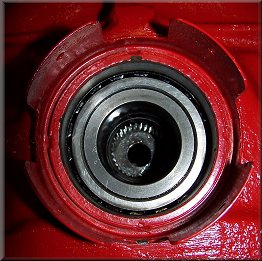
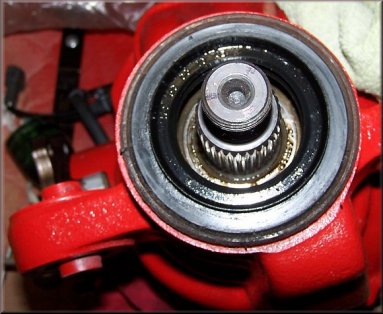
New Seal Pressed In -- Ensure front of seal is flush with front of housing, otherwise flange will rub
After working with the seals you may have introduced fresh gear oil to the exterior. Make sure you clean it off. Then, go to town to prep for paint -- I'm not going to rehease this step in detail because you can find PLENTY of information on how to prep things for painting. It comes down to getting it CLEAN and free of debris and loose stuff : ) To be a bit specific about what I did, I used a Dremel with an assortment of tools to cut down as much as I could. A flapper wheels worked nicely to smooth out and remove any stuck on old paint. Then wire brush attachements to get into the nooks, corners, and around the dust guards.
Then, just put it back in as instructed in many writeups and FSM. Done!
YEAH RIGHT -- FOR THOSE replacing the bushings with ES Polyurethane bushings, the frustration may just be starting.
Energy Suspension Bushing Installation and Differential Reinstallation Help
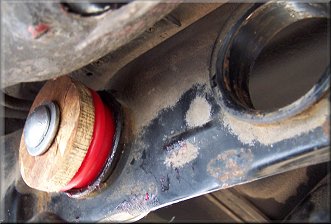
I thought I was done -- would just take an hour or so to get this thing slapped back in. Boy was I wrong. First thing needed was removal of the stock rubber bushings. I could say this is easy, but if you're doing it for the first time, it could take a while. The rear bushings can pretty much be removed as explained in the link above. I recommend using a saw to cut the outer shell of the rear bushings -- the front bushings can be pressed out at a shop quickly -- I was charged $10. Or you can try to get them out yourself.
Quickly remove what you can of any rubber from the washers and cups with a razor/exacto knife. Be careful not to cut yourself -- rubber and sharp things often equal tragedy. Then, use a course wire brush on a drill to clean up the washers and cups you will reuse. It's a waste of time to try any other method (from my experience) and here is a picture of the results from "whitepearlz" on TwinTurbo.net
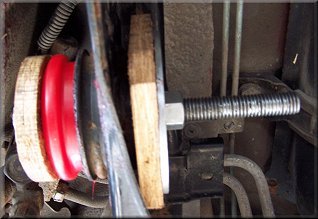
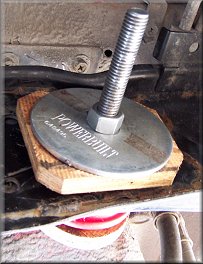
Getting the poly bushings in place took me several hours. I tried to use the tool as explained in the bushing replacement writeup. Sorry - didn't work to well. What happened a million times? I would start getting the bushing pulled in, then once side would start caving into the hole while the other resisted. The bolt would start going sideways and there was no way to get thing aligned again. Had to remove the tool and start again. I tried this probably 10-20 times.
So, I posted many times asking how people did this...we had an incredible thread going on TT.net and I named a winner : ) It will probably take you only one or two tries with this tool - and you should note two thing: A) his subframe was out of the car. 2) USE THE ORIGINAL CUPS inside the bushing to help keep the threaded rod aligned and it should go right in. TRUST ME, this tool was awesome. I modified it a little bit (didn't have the metal or the room to use it). I found it helpful to use some cut pieces of plywood as it allowed a little forgiveness and better grip (compression) for the washers.
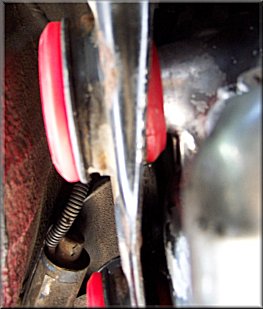
So, after hours (and within days) of frustration, I was ready to throw in the diff. I had a helper for this, and it was still total hell. After my helper took off, I was at it alone and becoming more and more frustrated every second. Finally, it was suggested to use ratcheting tie-down straps to help. The problem here was that I could not get the studs on the rear far enough into the new bushings and I could not get the front carrier bushing holes aligned. You can't exactly use your legs to try to press the diff in because you endanger yourself seeing as your car is up on jack stands. The tie downs used as shown are only pulling the differential by using the car itself (the toe hooks), so there is no danger in doing this.
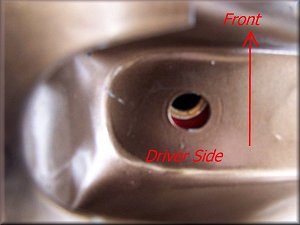
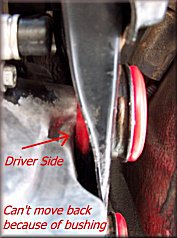
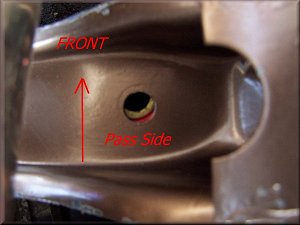
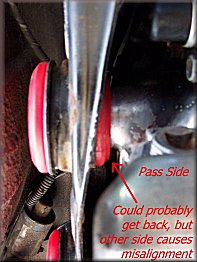
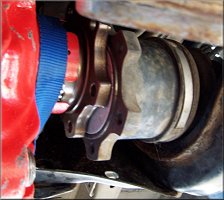
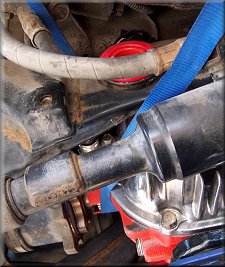
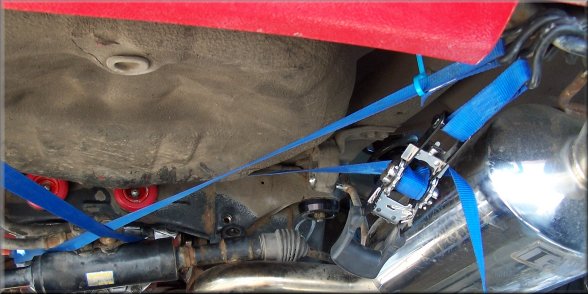
Anyway, I was finally able to get the passenger side bolt started, then the driver side, and I was set. The bolts are tapered to make it a bit easier. If they were not tapered, I don't think it would be possible to get them in. It was truly very tough and frustrating, but the kind of thing that once you do it once, you could probably do it again MUCH more quickly. With these bushings, however, and new seals, it probably should not have to happen for a couple more decades.
THE END