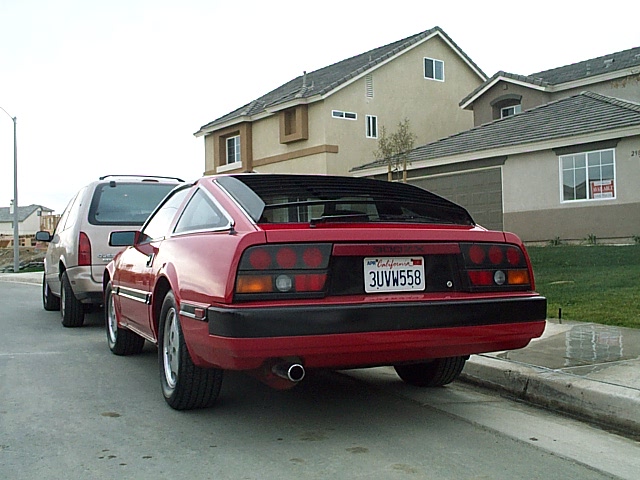
How to Modify your Stock Taillights
(84-86 Models)
The Z has some awesome styling. However,
many things can use some improvement to modernize its looks. The
later models of Z's (87-89) have the advantage of having more
modern styling...particularly the taillights (in my opinion).
So all us 84-86 Z owners, lets see what we can't do to get things
looking a bit better. I have the templates if you would like to
borrow them.
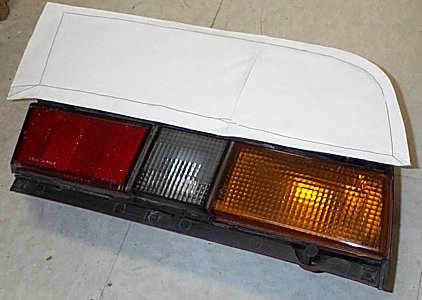
Here's a comparison of old to new:
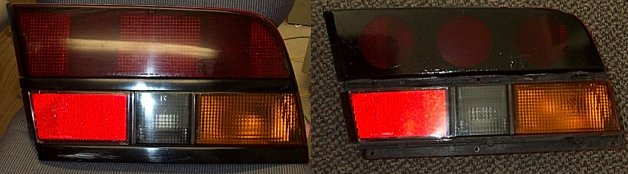 I have done many things to get my Z
out of the 80's (though my heart still belongs there). I saw a
few people doing things to modify the taillights, such as adding
the European light bulb for a fuller look. I saw one or two people
modify their taillights a bit more drastically and I really liked
it. So I gathered some info. and got to it. Here is the lowdown
and comparitive pics. This is Dennis'
Description, where I learned how to do this mod.
I decided to go with 3 circles at the
top, 1 circle on the bottom (reverse light), and round off the
blinker and European light a bit more. The procedure is simple
and cheap. You'll only run into a couple obstacles.
I have done many things to get my Z
out of the 80's (though my heart still belongs there). I saw a
few people doing things to modify the taillights, such as adding
the European light bulb for a fuller look. I saw one or two people
modify their taillights a bit more drastically and I really liked
it. So I gathered some info. and got to it. Here is the lowdown
and comparitive pics. This is Dennis'
Description, where I learned how to do this mod.
I decided to go with 3 circles at the
top, 1 circle on the bottom (reverse light), and round off the
blinker and European light a bit more. The procedure is simple
and cheap. You'll only run into a couple obstacles.
 First you need to buy material. You'll
be using black decal material (or other colors to match your paint
job). It is decal material. You can call any local sign shop and
pick it up. I found 14" wide black material for $1.50/ft.
I bought 4 ft...which is enough to do both taillight with enough
extra for two mistakes. They may suggest buying some transfer
tape (which is a very mild but thick masking tape), obvioulsy
to help TRANSFER the decal material. The material is very thin
and subject to binding...even a light wind can ruin your day in
a hurry.
You'll want to do this one section
at a time...first the top section and then the bottom. It isn't
necessary to use 3 separate peices for the bottom parts. We'll
cover the top part first and then the bottom.
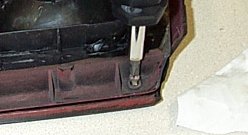
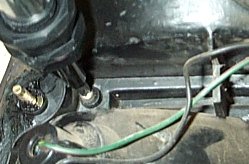
In my opinion it is most effective
to remove the tiallight assembly. Consult your Haynes Manual for
details on that. Once you have the taillight removed, remove the
two black plastic strips from the middle and bottom of the taillight
assembly (done by removing 3 screws from the backside). This will
make it easier to place the decal material without folds and bubbles.
First you need to buy material. You'll
be using black decal material (or other colors to match your paint
job). It is decal material. You can call any local sign shop and
pick it up. I found 14" wide black material for $1.50/ft.
I bought 4 ft...which is enough to do both taillight with enough
extra for two mistakes. They may suggest buying some transfer
tape (which is a very mild but thick masking tape), obvioulsy
to help TRANSFER the decal material. The material is very thin
and subject to binding...even a light wind can ruin your day in
a hurry.
You'll want to do this one section
at a time...first the top section and then the bottom. It isn't
necessary to use 3 separate peices for the bottom parts. We'll
cover the top part first and then the bottom.
In my opinion it is most effective
to remove the tiallight assembly. Consult your Haynes Manual for
details on that. Once you have the taillight removed, remove the
two black plastic strips from the middle and bottom of the taillight
assembly (done by removing 3 screws from the backside). This will
make it easier to place the decal material without folds and bubbles.
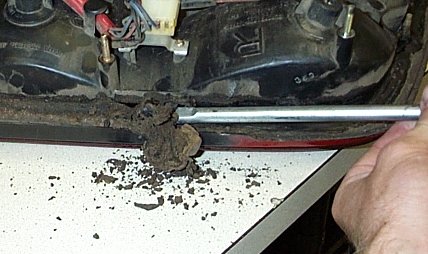
 If your taillight have been letting
water into the rear of the car, get some new butyl sealant tape
for when you put the tiallights back on. Clean off all the old
sealant first.
If your taillight have been letting
water into the rear of the car, get some new butyl sealant tape
for when you put the tiallights back on. Clean off all the old
sealant first.
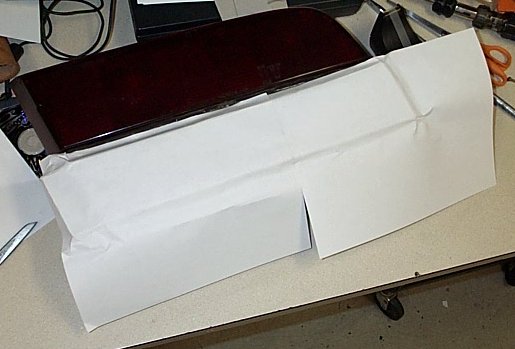
 Get a peice of normal 'ol paper (or
two taped together) and smash it to fit the curves. You can start
pretty liberally. Make some basic marks. Don't forget to cover
the curves. Once you have a basic shape, cut it out, and then
you can refit it and make the cuts more precise. If anything,
leave a little extra slack...you can always cut the excess decal
material off the edges.
Get a peice of normal 'ol paper (or
two taped together) and smash it to fit the curves. You can start
pretty liberally. Make some basic marks. Don't forget to cover
the curves. Once you have a basic shape, cut it out, and then
you can refit it and make the cuts more precise. If anything,
leave a little extra slack...you can always cut the excess decal
material off the edges.
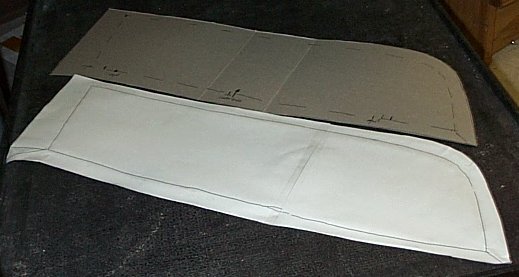
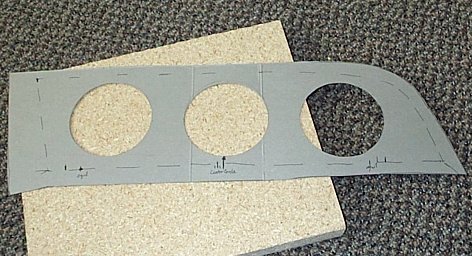
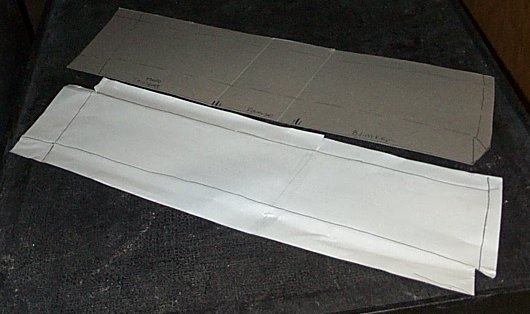
 Get a large cereal box and break it
up until it is flat. Place the paper template (above) on it and
trace it. Then take some time to make the cut out more accurate.
Basically what you want is to make a template big enough to cover
all the red relector material and a bit more on each edge to wrap
the vinyl over. If anything, make the template too big because
you can just lay the excess over the side of the taillight and
cut off the excess with an Exacto knife.
Get a large cereal box and break it
up until it is flat. Place the paper template (above) on it and
trace it. Then take some time to make the cut out more accurate.
Basically what you want is to make a template big enough to cover
all the red relector material and a bit more on each edge to wrap
the vinyl over. If anything, make the template too big because
you can just lay the excess over the side of the taillight and
cut off the excess with an Exacto knife.
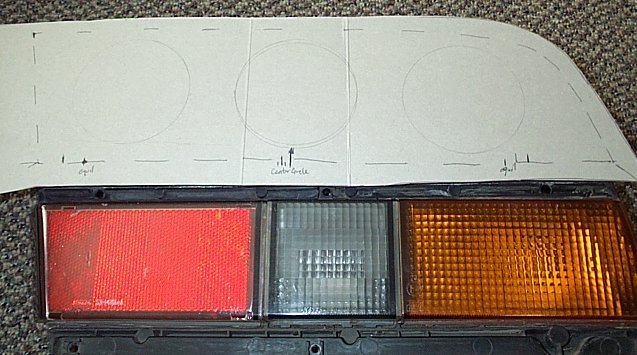
 With the top template cut out, you
need to decide where the circles will go and how big they should
be. This will require a little eyeball work, as there is no completely
accurate way you can detail this work. All I did was measure the
length of the flat surface of the taillight, space the circles
about 3/4" apart and make sure their centers were all lined
up (no curvature between circles). On the cardboard you can make
marks to show where the circles will be (see little arrows on
the bottom of template).
With the top template cut out, you
need to decide where the circles will go and how big they should
be. This will require a little eyeball work, as there is no completely
accurate way you can detail this work. All I did was measure the
length of the flat surface of the taillight, space the circles
about 3/4" apart and make sure their centers were all lined
up (no curvature between circles). On the cardboard you can make
marks to show where the circles will be (see little arrows on
the bottom of template).
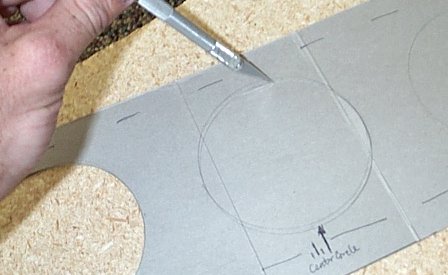
 Once the template is made, cut out
the circles.
Once the template is made, cut out
the circles.
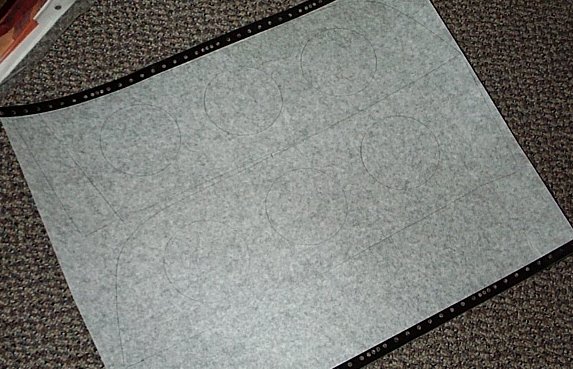
 Take a peice of the decal material
and place the template on it with the application masking tape
side up. Outline the template with a pen or something...don't
press too hard. The vinyl can stretch easily. Make sure you get
application masking paper to put the decal stuff on easier. This
makes it easier to move around if necessary, as well, without
streching the very stick material. This is a factor thorughout
this procedure...try not to put unnecessary stress on the vinyl.
Take a peice of the decal material
and place the template on it with the application masking tape
side up. Outline the template with a pen or something...don't
press too hard. The vinyl can stretch easily. Make sure you get
application masking paper to put the decal stuff on easier. This
makes it easier to move around if necessary, as well, without
streching the very stick material. This is a factor thorughout
this procedure...try not to put unnecessary stress on the vinyl.
 With the outline made, cut out the
outline of the shape, and then put the decal material on a good
cutting surface and use an Exacto knife to cut out the circles.
With the circles, follow the line as close as possible, otherwise
you'll get some poorly shaped circles and everyone will be able
to tell it isn't stock or aftermarket...you want this to look
good. That's why I have this mod in the Sharpen Up section :)
Flip the template around to create
the decal for the opposite side.
Once this is done you're ready to lay
it onto the taillight. Make sure the surface of taillight is clean.
You now need to remove the decal from the paper backing. This
is where things start getting tough. Don't pull to hard and make
sure the decal material doesn't fold and stick to itself; another
good reason to get the application masking paper. The decal material
is tough to pull back off of the taillight once it is placed down,
and I had to do it a couple times to line it up better. Don't
apply extra pressure to the decal material against the taillight
until you are sure you have it lined up like you want. Make sure
as you lay it down you don't get any binding or bubbling. If you
get small bubbles (which you will, trust me), don't worry too
much. Work the air out by pressing from one side to the other
until you isolate the air. Take the tip of the exacto knife and
just poke the air bubble and then work the air out from the edges
until the bubble is deflated. You'll won't notice where you have
slit it. The material is thin. You may want make some alignment
marks on the taillight to make the lining up of the decal easier.
Don't use abrasive cloths or paper towels if you have any clean
up, because you'll scratch the vinyl up. Around the edges you
will get some binding...just try to minimize it. If you have excess
around the edges of the relector material you can fold it over
or take the Exacto knife and edge it. Then just pull of the excess
material.
The template procedure is the same
for the bottom, excepting of course, the shape of the bottom half.
Cut out the general shape. Decide how you want to design the openings
for the blinker/European light and cut out a smaller circle (use
a smaller cup) for the reverse (white) light. You don't need to
cut out seperate peices for the separate lights on the bottom.
In fact, it probably looks better to have one solid peice and
cover up the separations.
With the outline made, cut out the
outline of the shape, and then put the decal material on a good
cutting surface and use an Exacto knife to cut out the circles.
With the circles, follow the line as close as possible, otherwise
you'll get some poorly shaped circles and everyone will be able
to tell it isn't stock or aftermarket...you want this to look
good. That's why I have this mod in the Sharpen Up section :)
Flip the template around to create
the decal for the opposite side.
Once this is done you're ready to lay
it onto the taillight. Make sure the surface of taillight is clean.
You now need to remove the decal from the paper backing. This
is where things start getting tough. Don't pull to hard and make
sure the decal material doesn't fold and stick to itself; another
good reason to get the application masking paper. The decal material
is tough to pull back off of the taillight once it is placed down,
and I had to do it a couple times to line it up better. Don't
apply extra pressure to the decal material against the taillight
until you are sure you have it lined up like you want. Make sure
as you lay it down you don't get any binding or bubbling. If you
get small bubbles (which you will, trust me), don't worry too
much. Work the air out by pressing from one side to the other
until you isolate the air. Take the tip of the exacto knife and
just poke the air bubble and then work the air out from the edges
until the bubble is deflated. You'll won't notice where you have
slit it. The material is thin. You may want make some alignment
marks on the taillight to make the lining up of the decal easier.
Don't use abrasive cloths or paper towels if you have any clean
up, because you'll scratch the vinyl up. Around the edges you
will get some binding...just try to minimize it. If you have excess
around the edges of the relector material you can fold it over
or take the Exacto knife and edge it. Then just pull of the excess
material.
The template procedure is the same
for the bottom, excepting of course, the shape of the bottom half.
Cut out the general shape. Decide how you want to design the openings
for the blinker/European light and cut out a smaller circle (use
a smaller cup) for the reverse (white) light. You don't need to
cut out seperate peices for the separate lights on the bottom.
In fact, it probably looks better to have one solid peice and
cover up the separations.
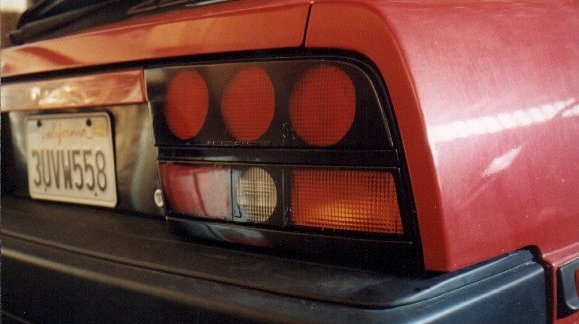
 Here are my results:
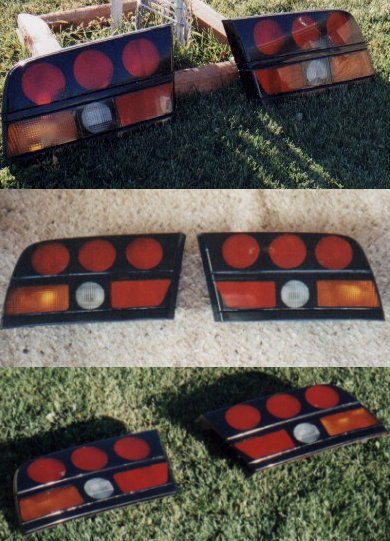 That'll do it. You'll have some nice
looking lights. Total cost should only be about $6.00 for the
material, and $5.00 for the Exacto knife. Questions??? Email thumper300ZX using the contact link above.
That'll do it. You'll have some nice
looking lights. Total cost should only be about $6.00 for the
material, and $5.00 for the Exacto knife. Questions??? Email thumper300ZX using the contact link above.