Refinishing that Wooden Wheel


Easy as 1 ...
2 ... 3 !!!
Click on any
picture for larger format (make sure photo is not FIT TO PAGE)
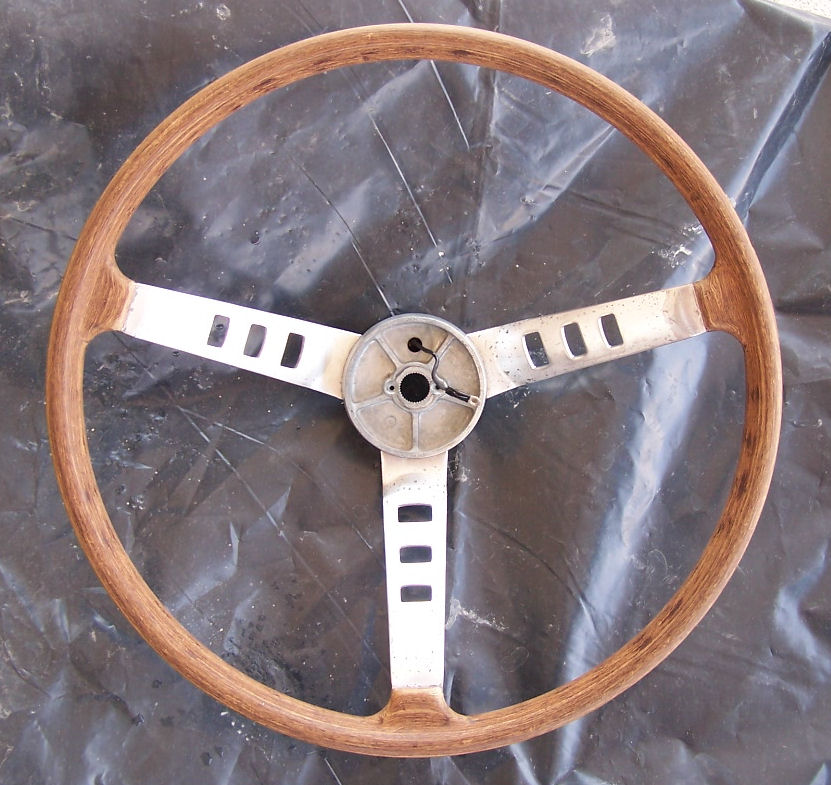
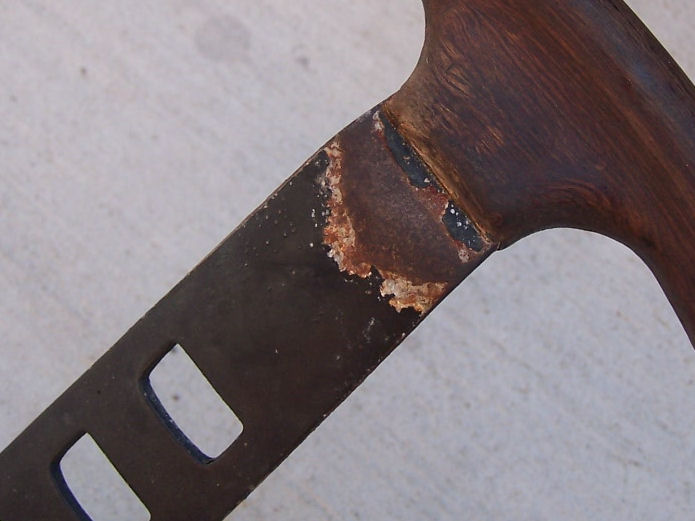
I bought my 240z in Sept 2006. Sure there was plenty to do, but the first project I had to get on was refinishing that wooden wheel. Now, I've read some say this wheel is not actually made of wood. If it isn't, Datsun did a great job making it look and act like wood -- it sands like wood, wets like wood, dries like wood, etc. How hard is it to refinish the wheel? Not hard at all. You'll typically see the wood looking dull and the edges of the spokes a bit worn, rusty, or otherwise corroded.
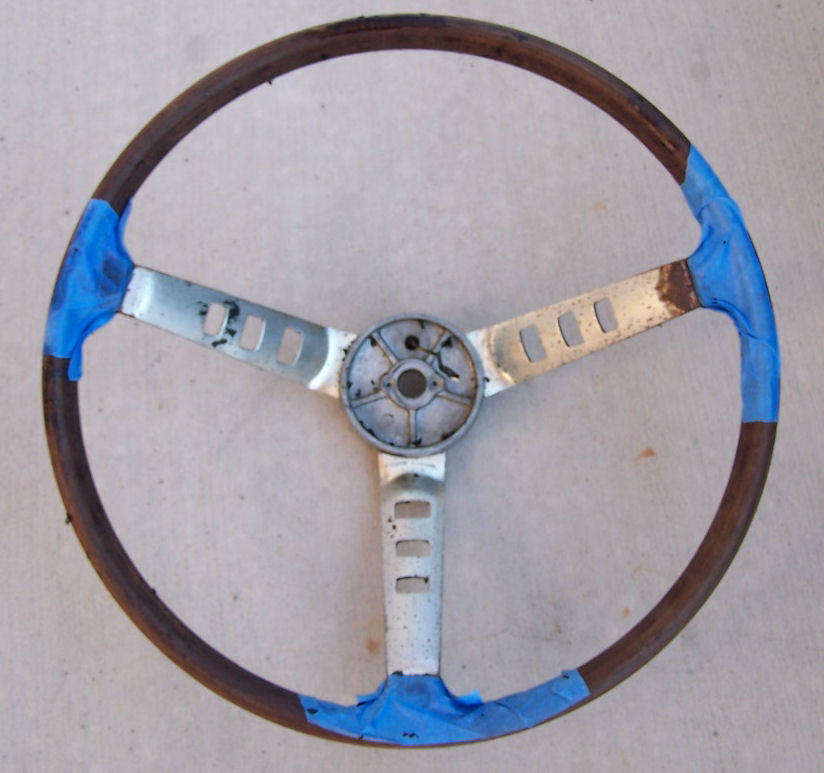
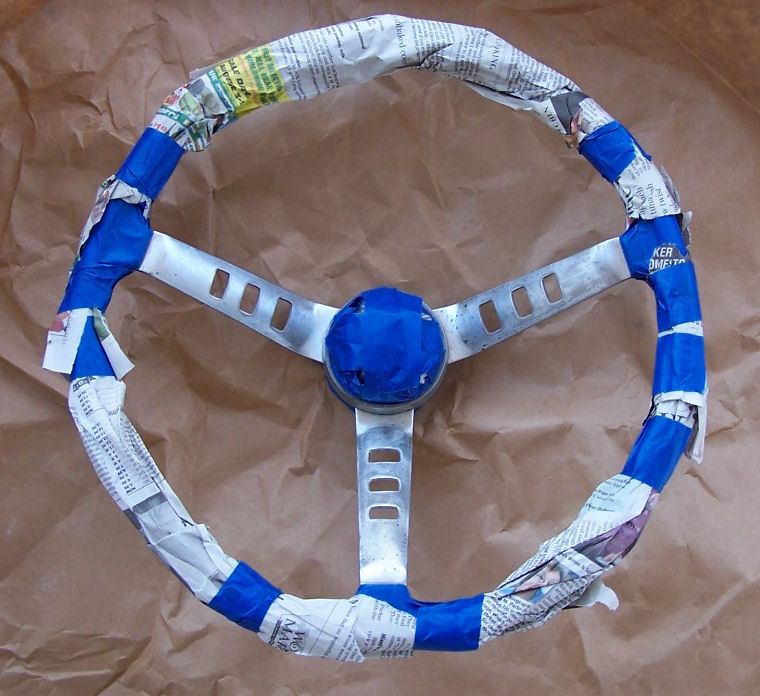
Start by pulling the wheel. Easy enough. Keep all the associated hardware in a bag so you don't lose them. Start sanding the wooden wheel with about 320 grit. Avoid putting too much pressure on the knobs (on back) and around any edges or you'll sand them down too much. Once you have a nice consistent finish, go to a higher grit (ie, 600). Then polish it off with a Scotch pad. Once you have the wood section nice, tape up the wood edge of the spokes.
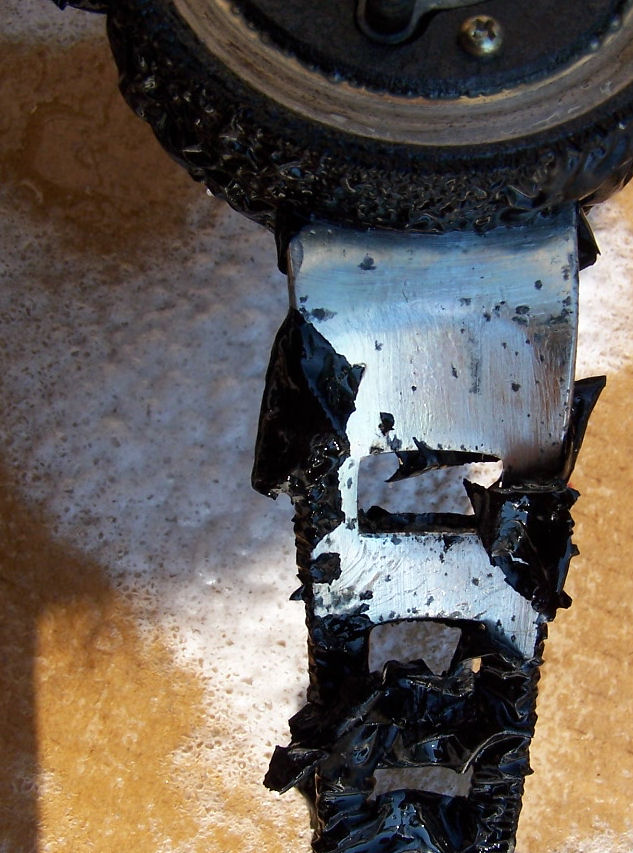
Carefully use some paint stripper (I like spray on stuff). The paint will quickly bubble up and be easy to remove. You'll quickly notice the inner wheel is aluminum. You might get it so shiny you won't want to paint it :) Use a fine wire wheel brush to remove any other paint. You can also use the wire wheel to prep the surface. I used sandpaper and a small wire brush on a Dremel tool just to be safe. I removed any and all rust, residue, and what looks like lime (white powdery stuff). Then a final go over with a Scotch Pad. Dang, looks pretty good just like that! I worried about the center being too reflective, however, so I decided to repaint the aluminum.

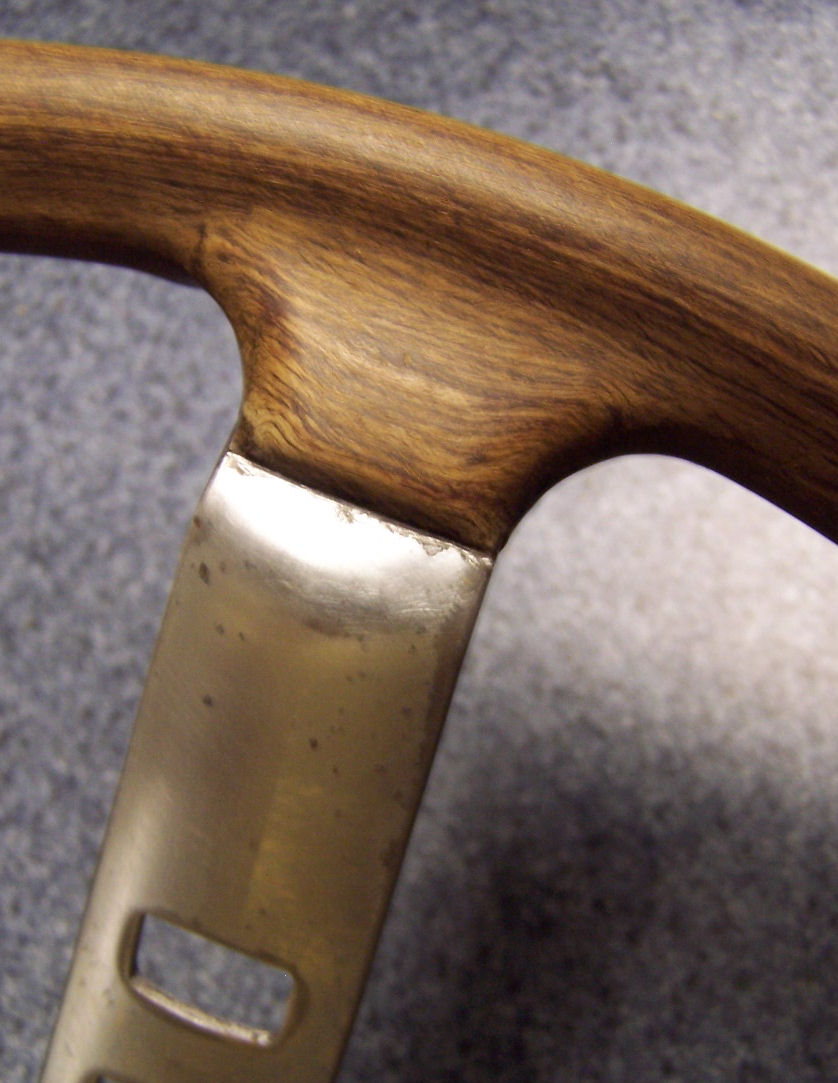
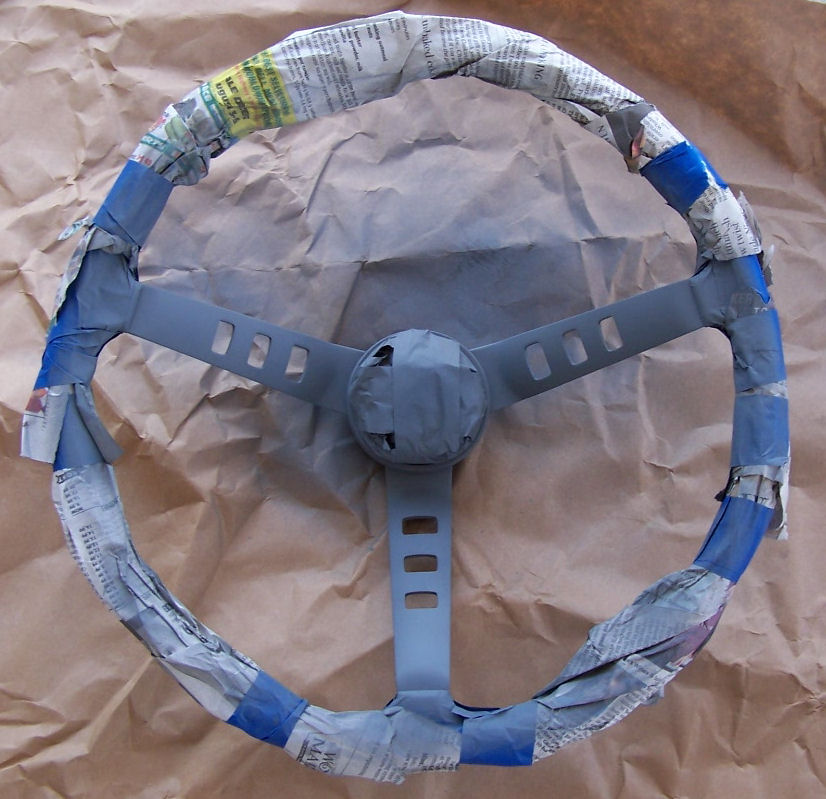
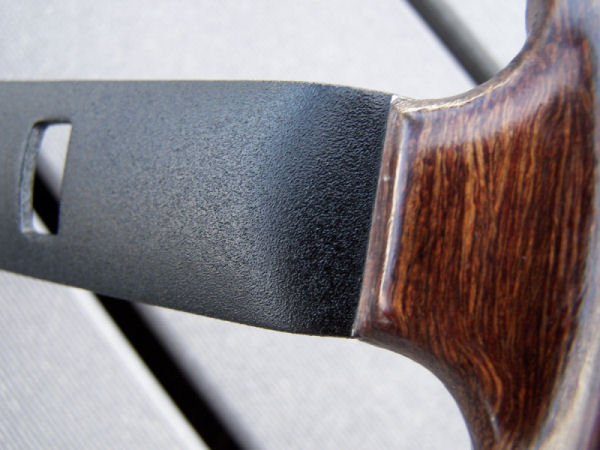
Do a polyurethane clear coat on the wood first. Tape up just the outer edge of the spokes. Apply as directed. I put on three light coats, wet sanding between coats. The poly coat brought out a really nice, rich color. I also prepped and refinished the wooden shift knob while I did this.
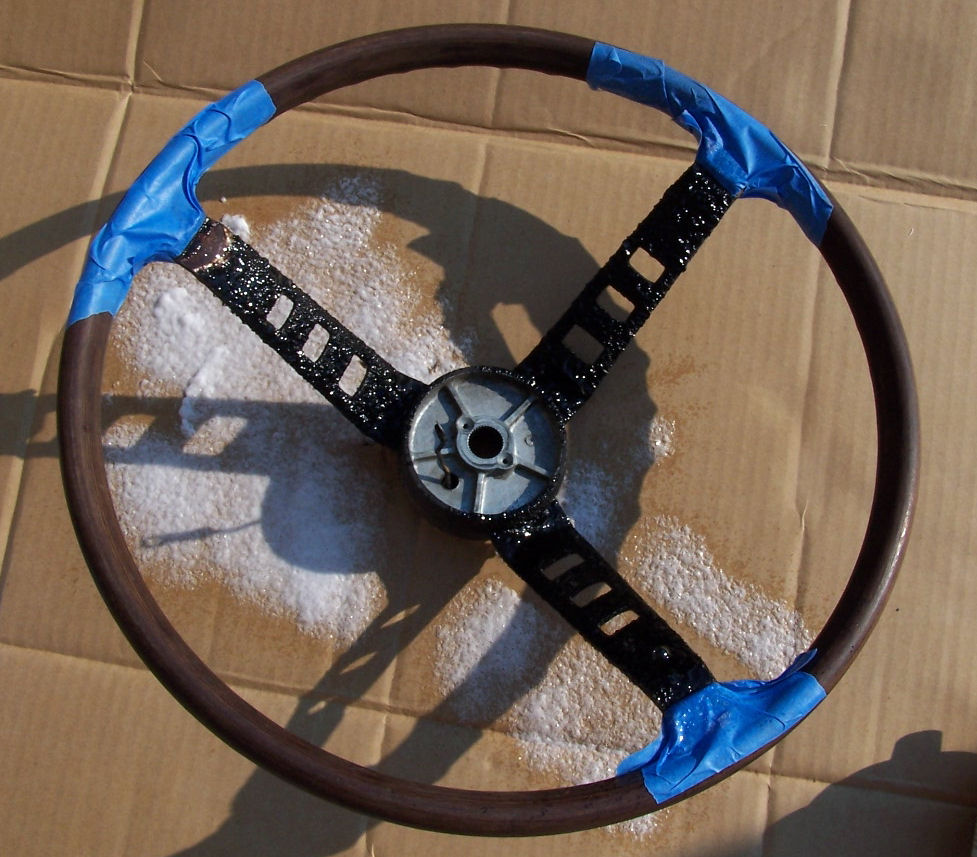
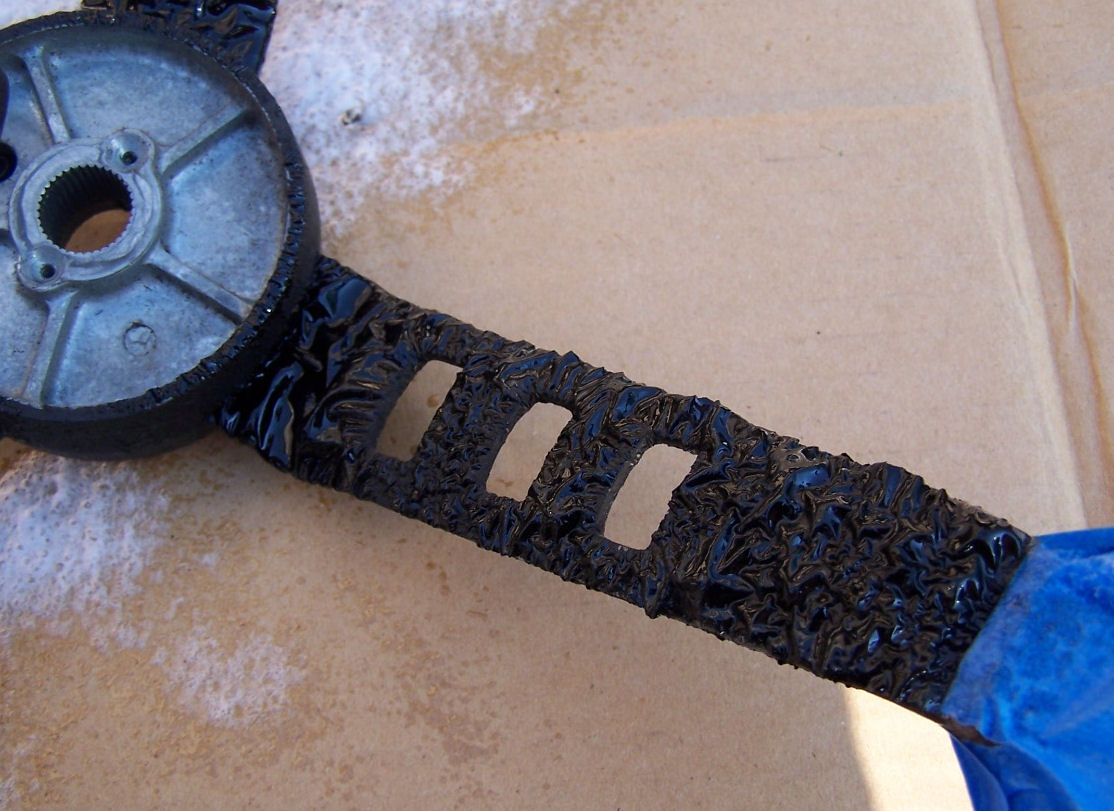
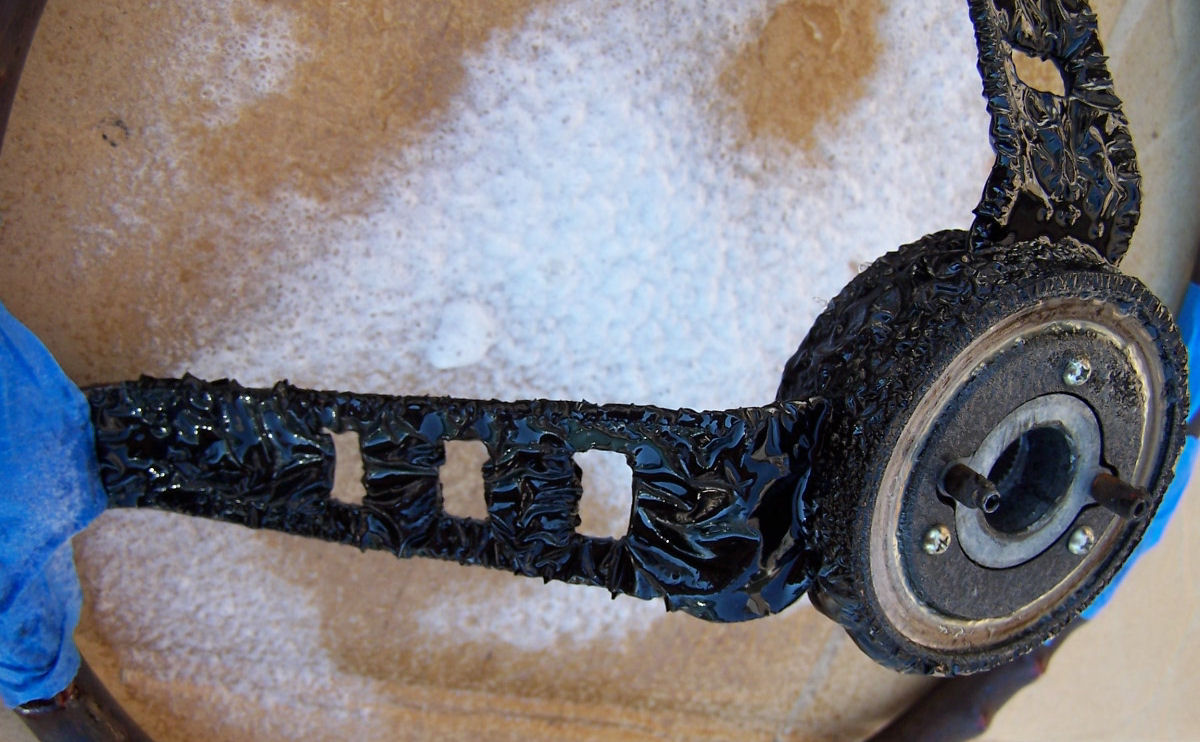
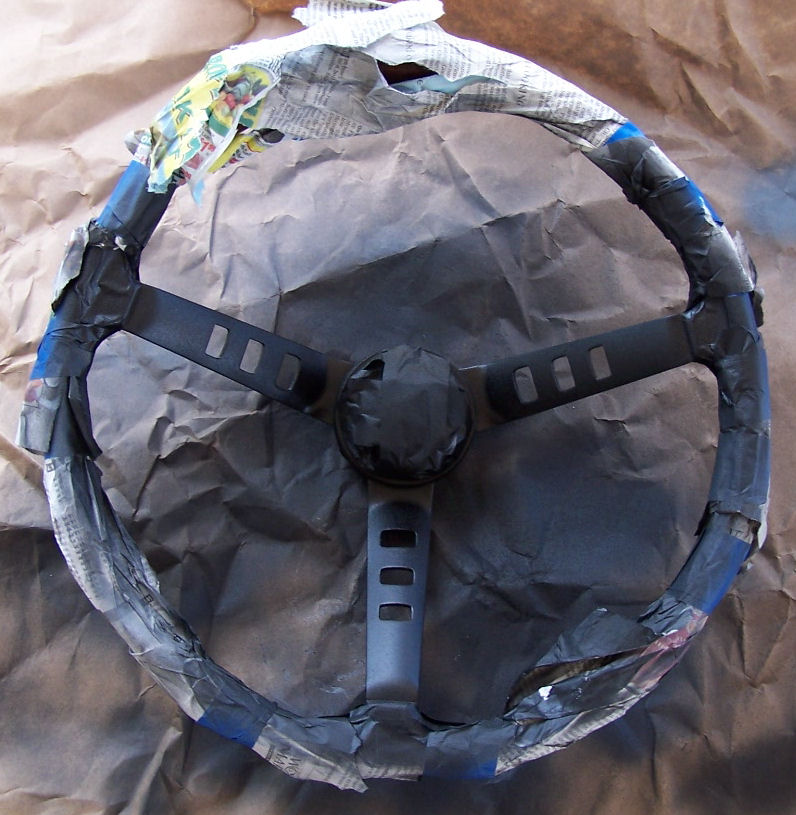
After the poly coat was completely cured, I proceeded to paint the center section. I taped it off as shown. Make sure the surface is clean and dust free. Put a very light "flash coat" of primer on. Then follow with a light, complete coat. Wet sand after it is dry (if needed). Then apply a flash coat of black paint. Follow with a light coat, let dry. Repeat with two more light coats. I used a special outdoor TEXTURED paint. It gives the wheel a great look and durable finish.

That's it. Took quite a bit of time, but most of that was waiting for coats to dry.
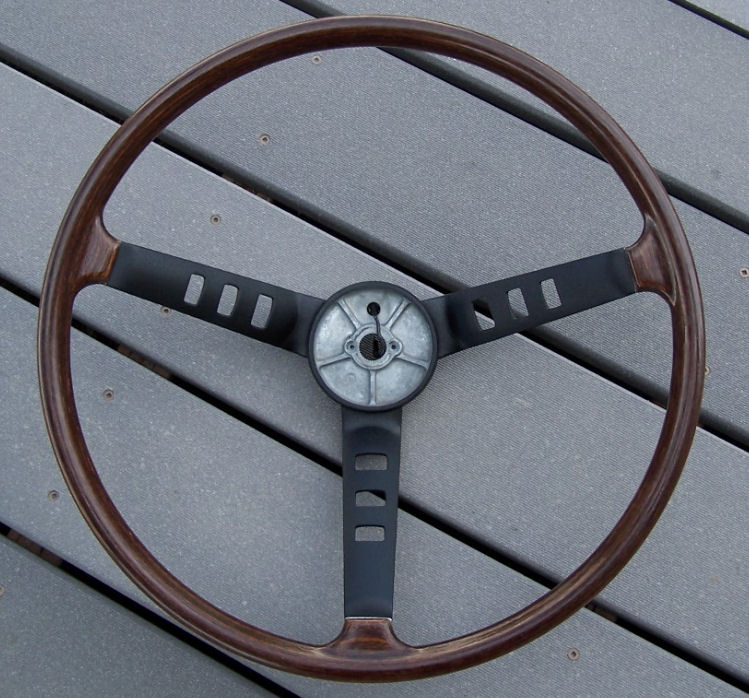
COMPLETED WHEEL (Above). One day I'll actually get it back in the car!