Valve Covers
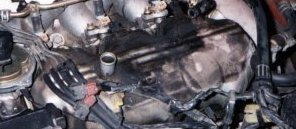
The reason I did my valve cover gaskets was because of a minor leak and mostly because of the mess that built up over so many years. Look at the driver's side cover in this pic!!! Putrid!!!
The passenger side is a cinch. Pull off any connectors that you can see will get in the way...label them if necessary, unscrew the bolts. The old gasket might have quite a grasp...so you may have to do a little pulling, pushing, and prying. Be very careful if you resort to prying...you're dealing with aluminum. You need those gasket surfaces to stay level for a good seal. Once you have the valve cover off, scrape off the old gasket material, making sure your don't drop any foreign material into the engine. I had a heck of a time scraping the gaskets off both valve covers. If anyone knows a good way to scrape them off let me know. This is a pic of the driver side cover gasket when I was done scraping it off!!!

Man that thing was stuck on!!! The passenger side gasket was even worse. I couldn't begin to put the pieces together for a pic.
Removal of the driver side valve cover is another story. I'm not going to lay it all out. You can get the directions from your Haynes Manual (or other preferred manuals). I will tell you the troubles and things I did to help myself. One thing I did was remove the distributor just to give myself a bit more room. Follow directions on how to remove the distributor if you decide to do it. Then, when I finally had everything off and the AC compressor pulley back, I still couldn't get the dang valve cover off. The best thing I did for that part was to have another person help me manuever the dang thing out. With two people "forcing" it out, it wasn't too bad. Again, you may find it difficult to remove the old gasket.
Once you have removed both valve covers, do car a favor and clean them up nice and pretty. I really wished I would've painted mine when I had them out. I would've gone with the original color I think, or as close as I could come to it. I've seen red, blue, and yellow and they are nice, but I've gone with the natural metal tones inside my engine compartment (eg...my collector cover)
 and I
think I'd stick with that. Anyways, clean them up...and then
install the new gaskets as Haynes instructs. I strongly recommend
using plastic gaskets (rubber) and not using sealant. The plastic
gaskets make their own seal. You also need to decide if you want
to replace the rubber grommits for the screws. I was surprised to
get the rubber grommits ordered and find out they didn't come
with the metal retainers. The metal retainers keep the grommits
from over compressing and cracking under the pressure of the
screws. You will have to remove the old grommits from the metal
retainers. Here is a picture of how I went about it.
and I
think I'd stick with that. Anyways, clean them up...and then
install the new gaskets as Haynes instructs. I strongly recommend
using plastic gaskets (rubber) and not using sealant. The plastic
gaskets make their own seal. You also need to decide if you want
to replace the rubber grommits for the screws. I was surprised to
get the rubber grommits ordered and find out they didn't come
with the metal retainers. The metal retainers keep the grommits
from over compressing and cracking under the pressure of the
screws. You will have to remove the old grommits from the metal
retainers. Here is a picture of how I went about it.
 I took a small screwdriver and just tapped it into the
side of the metal retainer until it hit the bottom of the
retainer and then pried the old grommit out. On some, I had to
tap the screwdriver in several times and pry a bit until it
loosened the old grommit. After they're all done just put the new
grommits in with the newly gasketed valve covers in place, screw
the bolts in with their new grommits. The gasket in this picture
is the new one I was putting in.
I took a small screwdriver and just tapped it into the
side of the metal retainer until it hit the bottom of the
retainer and then pried the old grommit out. On some, I had to
tap the screwdriver in several times and pry a bit until it
loosened the old grommit. After they're all done just put the new
grommits in with the newly gasketed valve covers in place, screw
the bolts in with their new grommits. The gasket in this picture
is the new one I was putting in.
One other matter you may want to consider, if you want to put in a 240SX Throttle Body now would be the time to do it...you are removing the intake collector which will need to be match ported for the new throttle body. Just get it ported while its off. Get an appointment so you can do everything in 1 day. The TB is another thing I wish I had done while I was doing this job.